
How to assemble your wedding invitations
After anxiously waiting, you have received your wedding stationery and are ready to get them assembled and in the mail to your guests. You realize that like many other things you have come across during the wedding planning process, that you don’t know how they should be put together. There of course, are rules to how wedding invitations should be assembled and I am here to help you!
A few tips prior to diving right in:
An example of a wedding suite containing a response card and envelope, details card, and invitation.
Recruit your family, friends, and wedding party to help you. Turn on some music and make a party out of it!
Thoroughly clean the surface of your workspace.
Keep food and drinks away from your workspace. Accidents happen, and having your invitations reprinted or readdressed is just too big of a chance to take. Play it safe!
This may sound like a strange one, but take off your nail polish. Gel is okay. I’m talking about the old school paint-and-dry variety. Nail polish can leave a streak of color when brushing your hand against the paper, and I’m sure that wasn’t a part of your design.
Go to the post office with one fully assembled invitation to confirm how much postage it requires. Purchase your stamps with this information. Wedding invitations have more pieces than your average mail and are on heavier paper, and 99.9% of the time require more postage than one forever stamp.
The biggest tip I can give you is to set up an assembly line. I repeat, the biggest tip I can give you is to set up an assembly line.
The auto industry invented it, countless other industries utilize it, so who are we stationers to reinvent the wheel?
Set your envelopes and enclosures into stacks on your workspace in the order that they go into the envelope. Then get to assembling!
Now let’s talk about the order of things. As Rose reminded Jack in Titanic, you start with the small silverware on the outside and work your way in to get to the larger pieces. Similar rules, along with some others, apply here.

Invitations and envelopes all stacked up and ready for assembly!
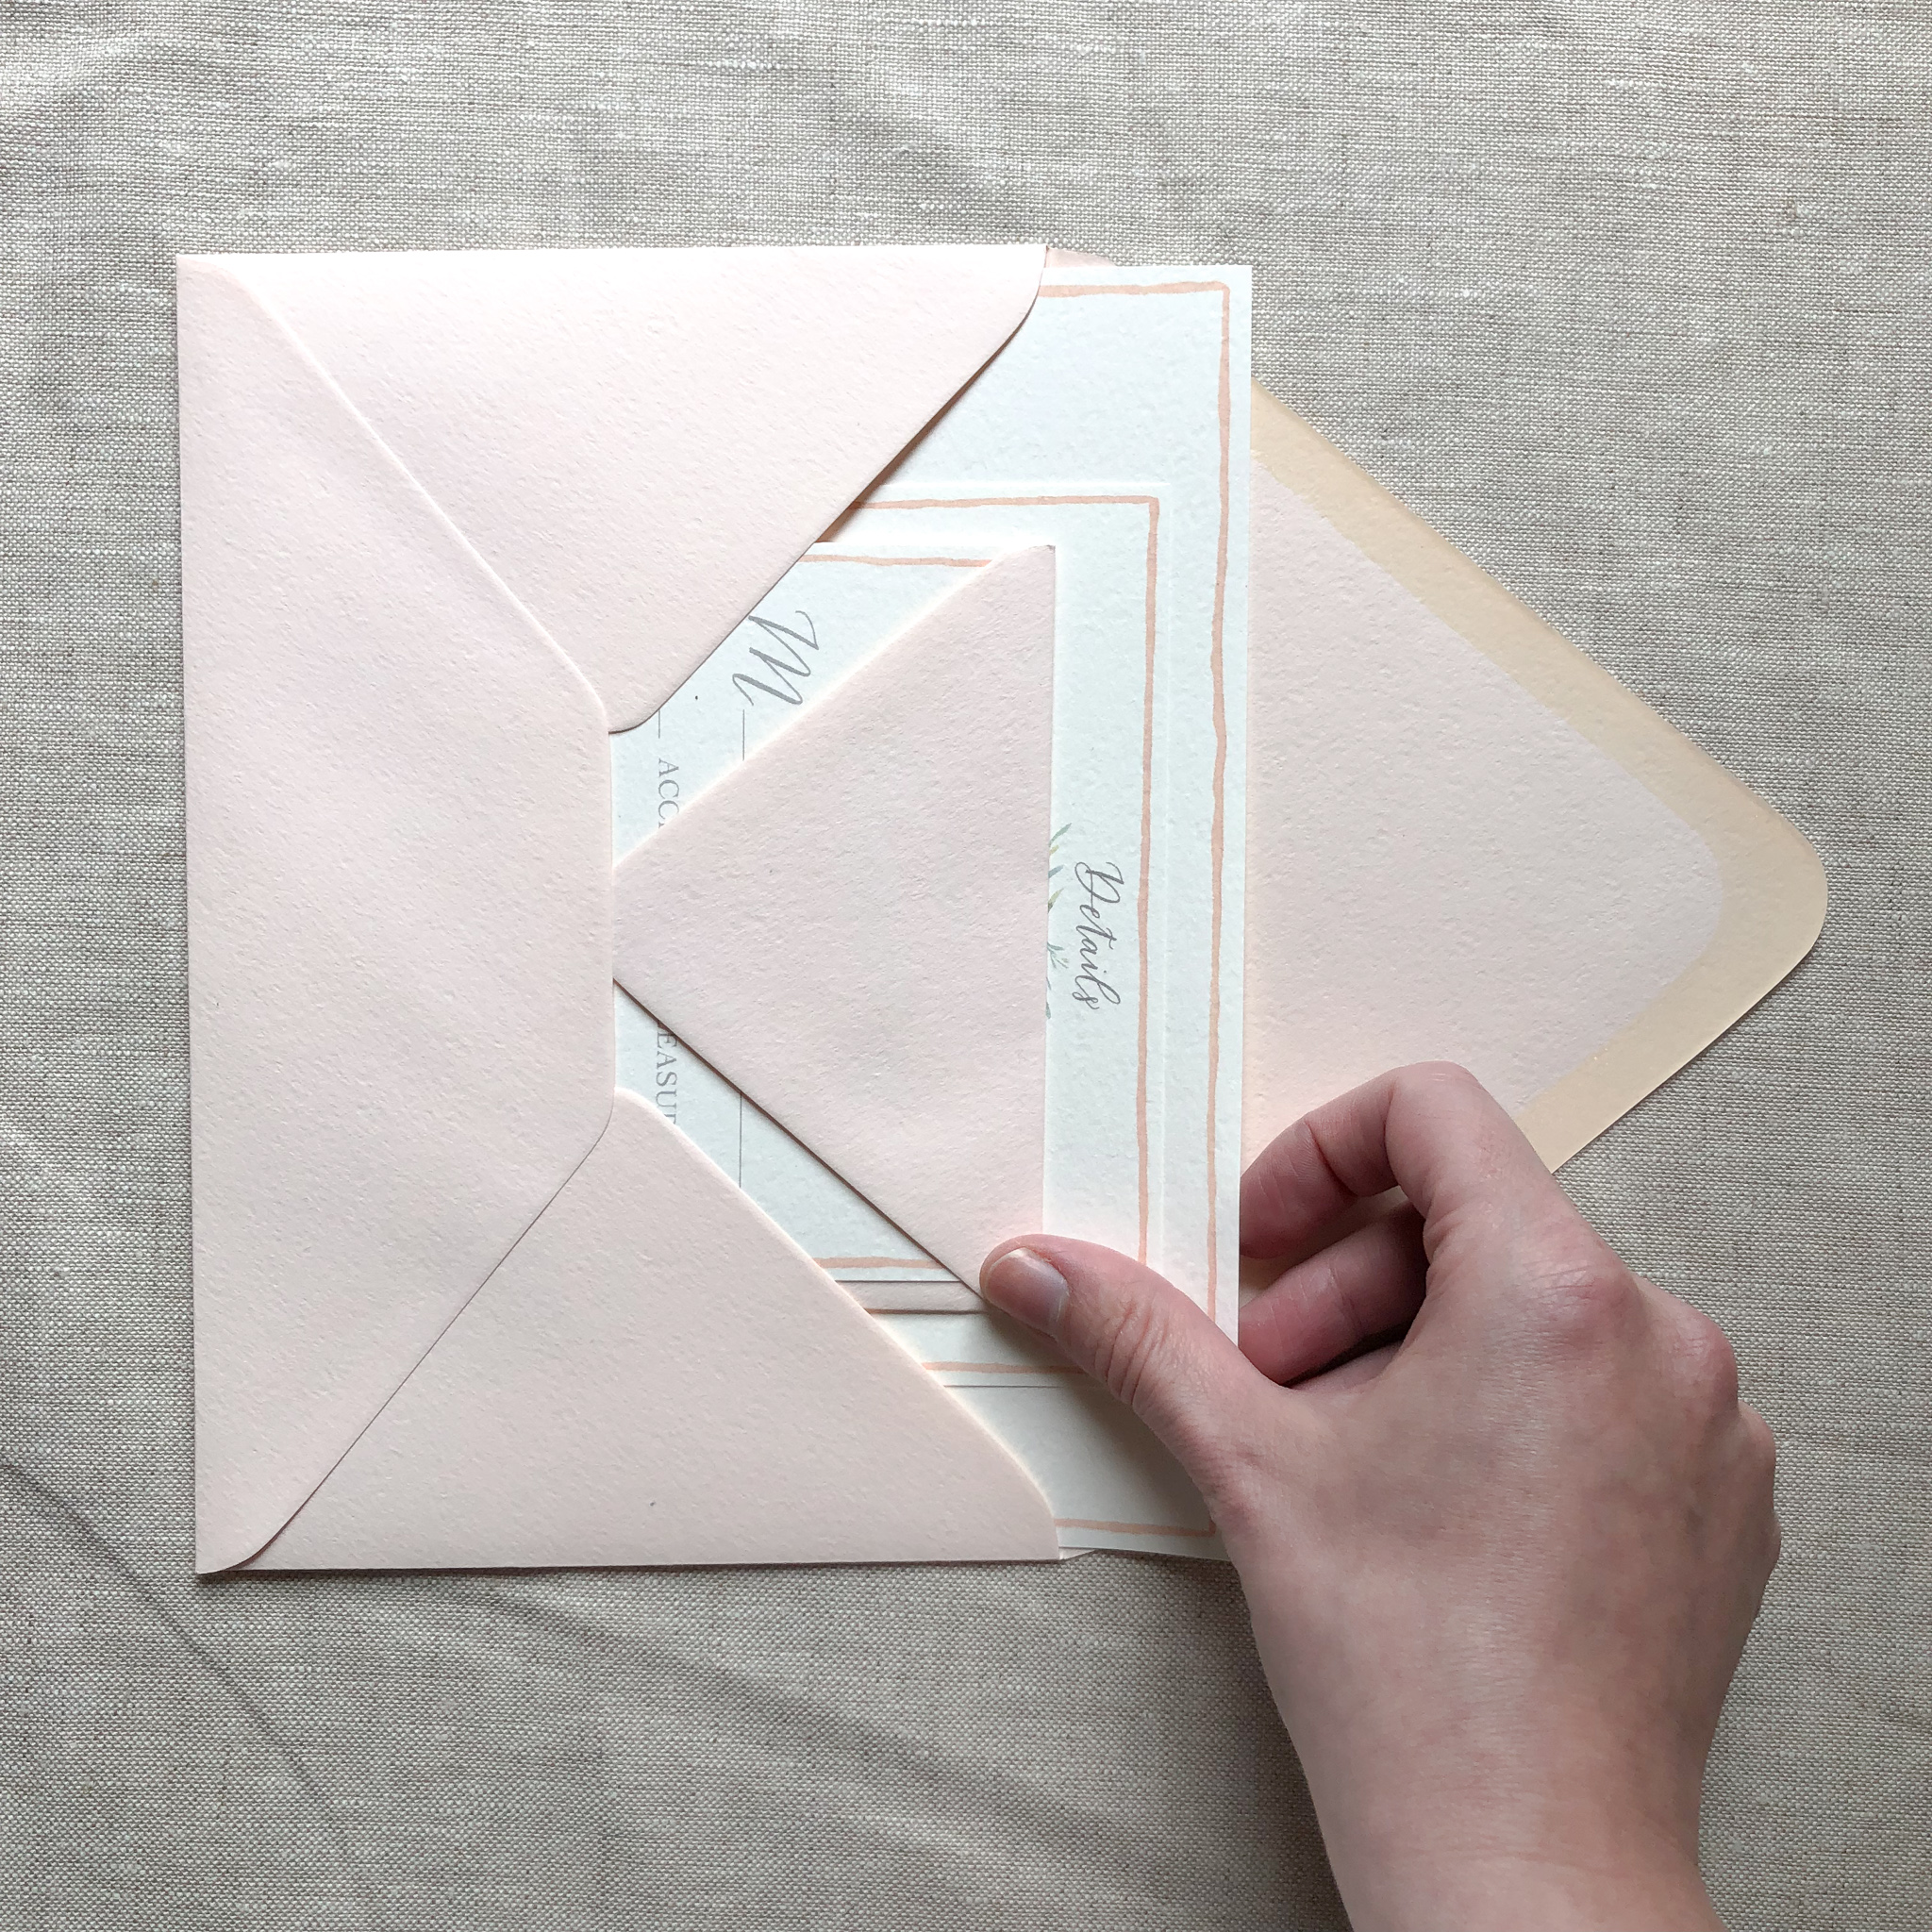
Your envelopes should be addressed before beginning this process. Stop! Do not pass go, or collect $200 if they are not! There are multiple inserts in wedding invitations, and trying to address them after they are assembled will cause your writing to look wonky.
All enclosures should be facing up, with the text side facing the opening of the envelope.
All enclosures should be turned in one of two directions, depending on its design.
Enclosures that are printed landscape should all be inserted so that the text is right side up when pulled out of the envelope.
Enclosures that are printed portrait should all be inserted so that the text laying on its left side when pulled out of the envelope.
The response card should be tucked into the flap (but not inside of) of its respective envelope.
The response card should be pre-addressed to the wedding host(s) and should have the correct postage applied.
The enclosures should be stacked in size order, smallest to largest, with your invitation being the largest and the bottom the stack, and should be placed in the envelope with the smallest insert closest to the opening.
If you are using inner envelopes, the same rules apply, the inner envelope is simply inserted into the outer envelope.
There are endless options of adornments such as belly bands, ribbon, and wax seals. These are more often than not added at the end of the assembly process.
I hope this helped to simplify a somewhat complicated topic. Happy envelope stuffing!
xoxo,
Alexandra